 Tillroll
 · Setup guide
How to set up Tillroll with RevenueCat
To set up Tillroll, open the app, copy the webhook URL and Authorization value it shows, and paste them into a new webhook in RevenueCat (your project → Integrations → Webhooks → Create new webhook). Then press Send test event in RevenueCat: when Tillroll says “Connection works” and your notch shows “RevenueCat connected”, you're done. It takes about two minutes, with no API key and no sign-up.
Tillroll is in Mac App Store review, so it isn’t available to install yet.Get notified at launch
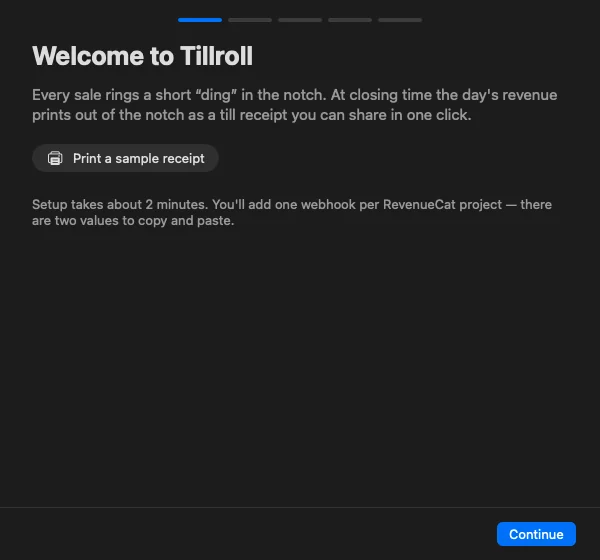
Install and open Tillroll
Tillroll runs on macOS 14 Sonoma or later and lives in your menu bar. Once it's on the Mac App Store, install it and open it: the Tillroll Setup window opens by itself on first launch. Press Print a sample receipt to see what your notch prints every night, then Continue.
Copy your webhook URL and Authorization value
The next screen, Where in RevenueCat?, shows where the webhook form is (step 3 below). The one after it, Connect RevenueCat, creates your account on the spot, with no sign-up and no password, and shows the values RevenueCat needs, each with a Copy button: the Webhook URL and the Authorization header value, which starts with Bearer twh_.
The URL is the same for every Tillroll user. The Authorization value is your own secret: it stays masked until you press the eye button, and Tillroll never asks for your RevenueCat API key.
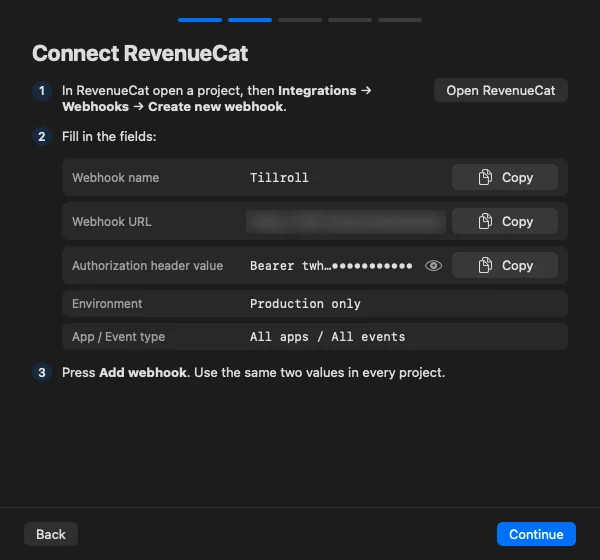
Add a webhook in RevenueCat
In the RevenueCat dashboard, open your project and click Integrations near the bottom of the left menu. Choose the Webhooks card, press Create new webhook, and fill in the form from top to bottom:
| RevenueCat field | What to enter |
|---|---|
| Webhook name | Tillroll |
| Webhook URL | Paste from Tillroll |
| Authorization header value | Paste from Tillroll (Bearer twh_…) |
| Environment to send events for | Production only (the default also sends sandbox) |
| App | All apps |
| Event type | All events |
Press Add webhook at the bottom right. Tillroll's own Where in RevenueCat? step shows the same path with screenshots, and its Open RevenueCat button takes you to the dashboard.
Tillroll only receives the sale notifications RevenueCat sends. It can't act for you: it can't touch subscriptions, refunds or your RevenueCat settings, and deleting the webhook in RevenueCat disconnects it at any time.
RevenueCat's webhook docs call the button “Add new configuration”; it opens the same form.
Send a test event
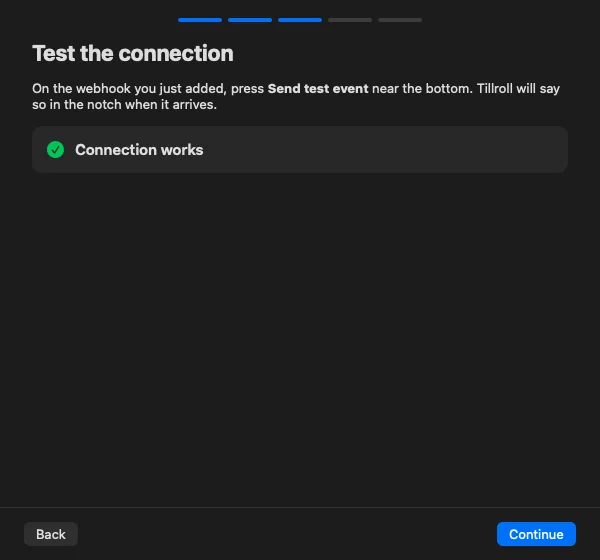
Back in Tillroll, press Continue to reach Test the connection. It says “Waiting for the test event…” and checks every 3 seconds.
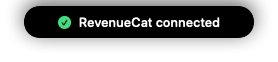
In RevenueCat, open the Tillroll webhook in the webhook list (Edit webhook), press Send test event in the Webhook Events section at the bottom, then Send Test Event on the next page. A few seconds later Tillroll says “Connection works” and your notch shows “RevenueCat connected”.
No webhook yet? Skip for now lets you finish setup anyway; see Try it without RevenueCat.
Name your apps
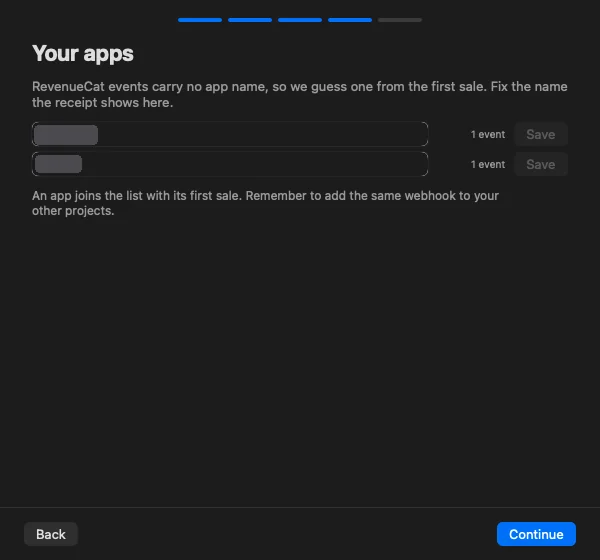
RevenueCat events carry no app name, so Tillroll guesses one from an app's first sale, usually from its product ID (a product like fitnote.monthly becomes “Fitnote”). In Your apps, type the name you want on the receipt and press Save.
An app joins the list with its first sale, so the list can be empty right after the test event. You can rename apps any time in Settings → App names. Names that match your App Store listing let the ding show the app's icon; otherwise it shows a letter badge.
Pick your closing time
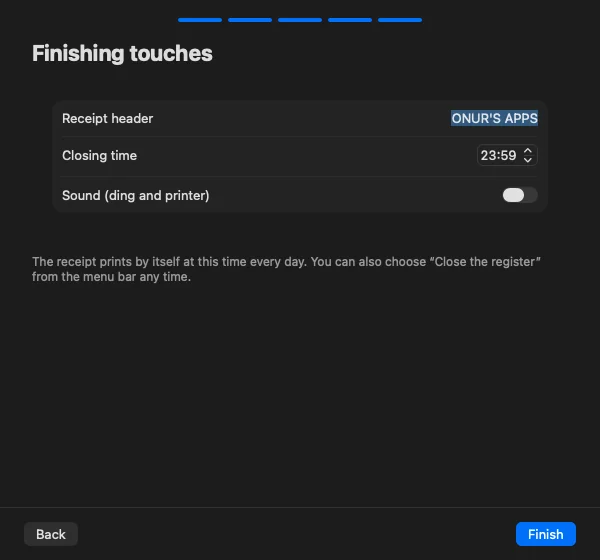
Finishing touches has three settings. Receipt header is the title on top of your receipt (MY APPS until you change it). Closing time is when the till closes: at 23:59 by default, the day's Z report prints out of the notch by itself, and Close the register in the menu bar prints it whenever you like.
Sound (ding and printer) is off until you turn it on. Paper themes, a daily goal and your time zone wait in Settings → Receipt.
Privacy while you share your screen
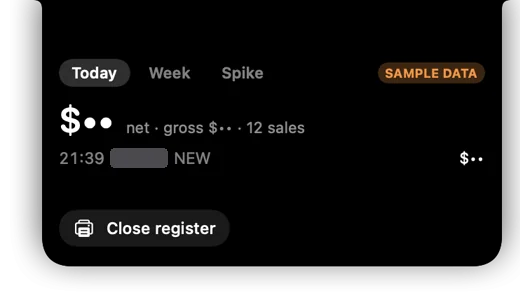
In Settings → Alerts, Hide amounts is set to While sharing the screen: amounts turn into $•• while Zoom sharing, OBS, Loom, Screen Studio or Cap is running. Sharing from a browser (Meet) or Teams can't be detected, so choose Always for those.
To hide app names instead, press Hide app names (the eye button) on a printed receipt. Apps then print as APP A, APP B on the receipt and its share card, and the amounts stay.
Connect your other RevenueCat projects
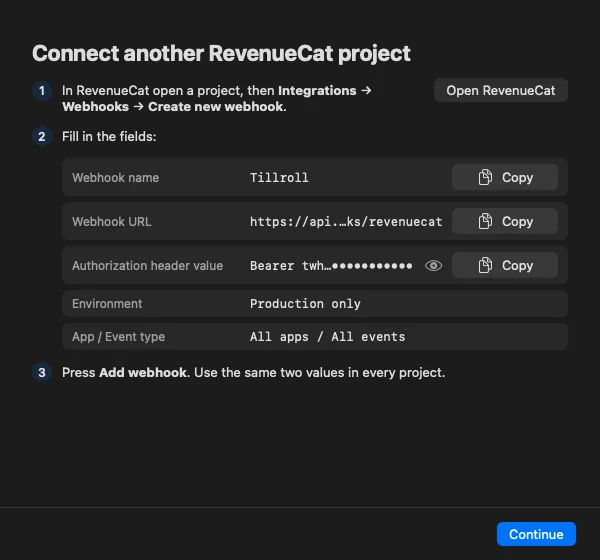
Each RevenueCat project needs its own webhook, and every one of them uses the same two values. Choose Add a RevenueCat project… in the Tillroll menu (or Add a project… in Settings) and repeat steps 3 and 4 in the next project.
Right after a successful test you can also press Connect another project. Every app ends up on one receipt, one counter and one streak.
Unlock Tillroll with Lifetime
Setup is free. When you press Finish, Tillroll asks for Tillroll Lifetime: one payment of $4.99 at the launch price, every feature, no subscription. The App Store shows the price in your own currency.
Until you unlock it, dings and receipts are paused and the menu shows Unlock Tillroll — Lifetime. Bought it before? Use Restore purchases in Settings → Purchase.
Try it without RevenueCat
During setup you can print a sample receipt on the first step, and Skip for now on the test step lets you finish without a webhook.
For a fuller tour, open Settings → Demo account and press Create the demo account. Tillroll creates a separate demo account and sends it 30 days of sample sales through its webhook, as RevenueCat would; your real account isn't touched. Then switch Account shown between Real and Demo, or turn on Live sales (every 10–25 s, for 10 min) to watch new sample sales ding in. Opening tillroll://demo?setup=1 does the same as the button.
Before you press Finish, Tillroll works without Lifetime. After that, the demo needs Lifetime too, just like your real sales.
Troubleshooting
The test event never arrives
Check that both values were copied whole; the Authorization value starts with Bearer twh_. Send the test while Tillroll is on Test the connection: a test sent before that step opened doesn't count. RevenueCat lists every delivery under Webhook Events on the webhook's page, and you can retry a failed one there.
The test worked, but real sales don't ding
Sandbox purchases are hidden by default: turn on Settings → Alerts → Show sandbox events, and make sure the webhook's environment includes sandbox. Real sales take a moment: RevenueCat usually sends a webhook 5 to 60 seconds after the purchase, and Tillroll checks for new sales every 30 seconds. If the menu says “Tillroll is locked”, dings wait for Lifetime.
I can't find Webhooks in RevenueCat
RevenueCat includes webhooks in its current Pro plan, which is free up to $2,500 in monthly tracked revenue. Some older legacy plans don't include them; RevenueCat's docs say to move to Pro in that case.
I made a new secret and the dings stopped
Settings → RevenueCat connection → New secret… replaces the old value at once. Paste the new Authorization value into every RevenueCat webhook.
My amounts show as $••
Hide amounts is set to While sharing the screen by default, so amounts hide while Zoom sharing, OBS, Loom, Screen Studio or Cap is running. Change it in Settings → Alerts → Hide amounts.
No receipt printed last night
If your Mac is asleep at closing time, that day's receipt doesn't print by itself (it does if the Mac wakes up before the day is over). Sales aren't lost: they wait on the server and count toward the day they belong to.
My Mac doesn't have a notch
Tillroll works the same on displays without a notch: dings, the peek card and receipts appear in a small pill at the top centre of the screen.
I moved to a new Mac
Your Tillroll account lives in your Mac's Keychain. A new Mac starts with a new, empty account, so paste its values into your RevenueCat webhooks. Get Lifetime back with Restore purchases.
How do I disconnect or delete my data?
Delete the Tillroll webhook in RevenueCat and new sales stop arriving at once. To have your data deleted, email hello@justshipstudio.com with the subject “Delete my Tillroll data”. Details are in the privacy policy.
Still stuck?
Email hello@justshipstudio.com. The maker reads every message; your macOS version and a screenshot help a lot. More answers are on the support page.